When the students came into class the first thing I had them do was draw a portrait of themselves. When they were done I had them put it aside to use as a reference at the end of this lesson. We spent the rest of the class observing faces and talking about what the facial features looked like and facial proportion. We used lightly drawn lines to divide the face which helped with placement. The students added each facial feature as we discussed it. At the end of class they put the two portraits together to see if there were significant changes.
Here are some of the before and after portraits. I can see a difference. What do you think?
Is it a Picasso or a Matisse?
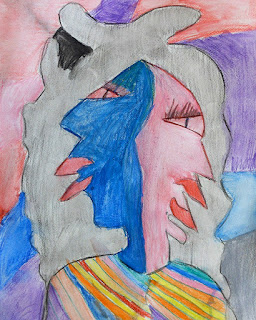
After learning what actual faces looked like and how to make realistic portraits it was time to be a little more creative. We found our inspiration in the artists Pablo Picasso and Henri Matisse. As an intro to the lesson we read the book "When Pigasso Met Mootisse" a tale of a moose and a pig which caricatures the relationship of the artists who inspired the book. We looked at paintings from both artists and compared and contrasted their unique styles. After our discussion the students drew portraits in the style of each artist. Matisse enjoyed painting in bold, bright colors with decorative backgrounds. His portraits were generally more realistic in proportion and placement but they could be painted with very unusual colors. Picasso's paintings were typically more subdued in color but he was much more creative with how he arranged his subject matter. He is most well known for painting in a style called Cubism.
 |
| Picasso |
 |
| matisse |
Beginning sketches
After making a drawing in each style the students chose one to use as their final project. They used tracing paper to transfer the drawing to watercolor paper and then added color with watercolor pencils

After they finished coloring with the pencils they brushed on water to activate the watercolor pencils.

Final Masterpieces


