Pages

Thursday, February 28, 2013

Third Grade: Faces

Realistic Self Portraits....where do the eyes go?

When the students came into class the first thing I had them do was draw a portrait of themselves.  When they were done I had them put it aside to use as a reference at the end of this lesson.  We spent the rest of the class observing faces and talking about what the facial features looked like and facial proportion.  We used lightly drawn lines to divide the face which helped with placement.  The students added each facial feature as we discussed it.  At the end of class they put the two portraits together to see if there were significant changes.


 Here are some of the before and after portraits.  I can see a difference.  What do you think?


Is it a Picasso or a Matisse?
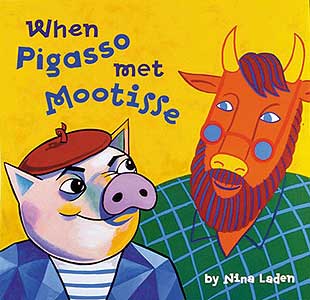
After learning what actual faces looked like and how to make realistic portraits it was time to be a little more creative.  We found our inspiration in the artists Pablo Picasso and Henri Matisse.  As an intro to the lesson we read the book "When Pigasso Met Mootisse"  a tale of a moose and a pig which caricatures the relationship of the artists who inspired the book.  We looked at paintings from both artists and compared and contrasted their unique styles.  After our discussion the students drew portraits in the style of each artist.  Matisse enjoyed painting in bold, bright colors with decorative backgrounds.  His portraits were generally more realistic in proportion and placement but they could be painted with very unusual colors.  Picasso's paintings were typically more subdued in color but he was much more creative with how he arranged his subject matter.  He is most well known for painting in a style called Cubism.

Picasso
matisse


Beginning sketches


After making a drawing in each style the students chose one to use as their final project.  They used tracing paper to transfer the drawing to watercolor paper and then added color with watercolor pencils


After they finished coloring with the pencils they brushed on water to activate the watercolor pencils. 


 Final Masterpieces


Wednesday, February 27, 2013

Second Grade: Camouflage

After working with color, line and pattern the previous two weeks we started our final project which combined all three elements. The second graders has been studying camouflage and this project ties into what they have been learning in the classroom.  Each student  started with a pre-printed lizard or chameleon.  They chose three watercolor pencils: one cool color and two warm colors OR one warm color and two cool colors.  They could use only these colors for the entire project.  The first step of the project was to pattern their lizard.  Then they would create a camouflaged background for it to "live" on.


After they finished patterning their lizards they cut them out and started designing the background.  They were instructed to use the same colors and make patterns compatible but not necessarily exactly like the lizard.


After they finished coloring the background they could use water to blend the watercolor pencil.  They could also use a sharpie if they wanted to define the outline.  (The lizards can be glued directly to the background or you can use foam tape to give give your lizard some relief).


Camouflaged Lizards and Chameleons


Monday, February 25, 2013

First Grade: Aboriginal Dream Paintings

The first graders were introduced to dotted dream paintings created by the aborigines of Australia.  We talked about the materials, techniques and symbols that the aborigines used and then made our own artwork using the dream paintings as inspiration.


The first step of the project was to use a q-tip to make dotted outlines that created a pattern around a pre-painted snake. The snake was used in this project because the rainbow serpent is an important symbol in aboriginal culture.


After finishing the outlines we talked about the symbols that we found in the aboriginal art.  The students chose symbols to use in their own artwork that would tell a story.


When their artwork was finished the students paired up with a partner to share the story they created with the symbols