You're invited to celebrate the grand opening of gallery to our large format art room with a Champagne celebration Sunday February 8th from 1 to 3 p.m. Stop by and enjoy art champagne hors d'oeuvres door prizes and live music the Champagne toast is it 2 o'clock join our artists of High Hand Gallery for this free celebration.
bitz n' bytz ......
Saturday, February 7, 2015
Friday, November 7, 2014
Wednesday, August 6, 2014
It's a Good Idea to Learn How to Use Fondant Before You Volunteer to Decorate the Wedding Cake
As I mentioned in the previous post, my son got married and I wanted to help with the reception but we live far away from the reception venue. I have four boys and no girls so wedding planning isn't something that came up much, really never, but it was still something I was excited about. When my husband and I went to visit our "new" family, the bride and her mom graciously let me be a part of the process, even asking me to come along and help pick out the dress, which I really appreciated. I found a picture of a cake that reminded me of her dress and impulsively volunteered to decorate the cake. I've done a little cake decorating but I had never worked with fondant and this cake was covered with fondant and fondant ruffles. Besides, I'm a sculptor so I was confident I could figure it out. I also planned to take a cake decorating class.
As it got closer to the wedding and I hadn't found a class I started to worry. Luckily for me my friend Alison was teaching a class on fondant for the girls at my church so I went to watch and pick her brain. She taught how to make a simple fondant out of marshmallows and powdered sugar and showed us some basics like rolling out the fondant, covering a cake and making simple flowers.
A few days later I went over to Alison's house and we played around with fondant strips and tried different ruffling techniques on a fondant covered bowl. She gave me some additional pointers and let me borrow some cake pans and decorating tools. She even made up some batches of fondant to take with me so I wouldn't have to worry about making a good batch of fondant when I got there. I hope I can pay it forward someday.
At this point I figured I could pull this off but I didn't know how long it would take or how hard it would be to decorate a real cake. Eventually we all agreed that it would be best to use styrofoam for the base and actual cake for the second layer. With the faux base I could make the ruffled layer ahead of time and then finish the edible second layer the day of the wedding. The top layer was a fondant covered wood disc. I used gray, satin ribbon as an accent (and to cover up the ragged bottom edges). The bride and groom cut and served each other pieces of the middle section of real cake and the guests were served pre-cut slices of sheet cake.
I made the bride and groom cake top figures from wooden clothespins and wooden heads and bases. The arms were made with wire covered with paper. The faces and hair were hand painted with acrylic paint. I used a pom pom for the bride's ponytail. The clothes were made out of lace, ribbon and felt and tried to match their real outfits. These were lot's of fun to make and I think they look a lot like the cute couple!
As it got closer to the wedding and I hadn't found a class I started to worry. Luckily for me my friend Alison was teaching a class on fondant for the girls at my church so I went to watch and pick her brain. She taught how to make a simple fondant out of marshmallows and powdered sugar and showed us some basics like rolling out the fondant, covering a cake and making simple flowers.
A few days later I went over to Alison's house and we played around with fondant strips and tried different ruffling techniques on a fondant covered bowl. She gave me some additional pointers and let me borrow some cake pans and decorating tools. She even made up some batches of fondant to take with me so I wouldn't have to worry about making a good batch of fondant when I got there. I hope I can pay it forward someday.
At this point I figured I could pull this off but I didn't know how long it would take or how hard it would be to decorate a real cake. Eventually we all agreed that it would be best to use styrofoam for the base and actual cake for the second layer. With the faux base I could make the ruffled layer ahead of time and then finish the edible second layer the day of the wedding. The top layer was a fondant covered wood disc. I used gray, satin ribbon as an accent (and to cover up the ragged bottom edges). The bride and groom cut and served each other pieces of the middle section of real cake and the guests were served pre-cut slices of sheet cake.
I made the bride and groom cake top figures from wooden clothespins and wooden heads and bases. The arms were made with wire covered with paper. The faces and hair were hand painted with acrylic paint. I used a pom pom for the bride's ponytail. The clothes were made out of lace, ribbon and felt and tried to match their real outfits. These were lot's of fun to make and I think they look a lot like the cute couple!
Tuesday, August 5, 2014
Back from my blog break......life happens
Wow, didn't realize I'd let so much time pass without checking in. At first it was because of teaching. Prepping for classes and then spending my days in the classsroom didn't leave much time for documentation. Before I could recover from the mess I made of my house and art room it was time to get ready for the summer wedding of my son. No time for organizing my thoughts. The actual wedding and reception was primarily the worry of the bride and her family although I helped with as much as I could from 7+ hours away. Since many of my family and friends weren't able to make the trip I wanted to have an open house for the bride and groom here, which required finishing some projects around the house/backyard.
It seemed like a good idea initially. Since I am deadline oriented I figured it would be a good way to motivate me to get my house/yard finished. Some of the projects were supposed to be done years ago. Six months seemed like plenty of time. Unfortunately time got away from me and I was in a panic during the weeks leading up to the event. Fortunately I have wonderful friends who came to my rescue. They took care of the food and helped with decorating. I finished the things in the house that I considered a priority and although there are still things to be done in the backyard it was done enough and now I have a backyard I enjoy spending time in!
Thursday, January 9, 2014
It's a New Year!
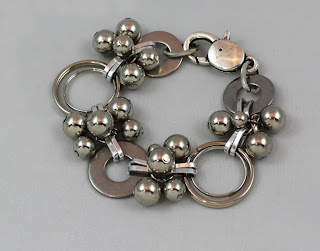
It's hard to believe we're already well into a new year. I enjoyed spending time with family and friends during the holidays. Unfortunately I never quite got the decorations all the way up and I'm still not done taking them down. I tend to get distracted. I'm hoping to get some artwork finished before I begin teaching again. Fortunately I tend to work better under deadlines. I did manage to find time to make some jewelry.
Wednesday, October 9, 2013
Subscribe to:
Posts (Atom)